In this blog I´m gonna write simple tutorials to get people start trying new things. My first blog is about how to use Microsoft Visual Studio 2017 to create a Rest Service Api. Hopefully a help for someone new.
Step 1
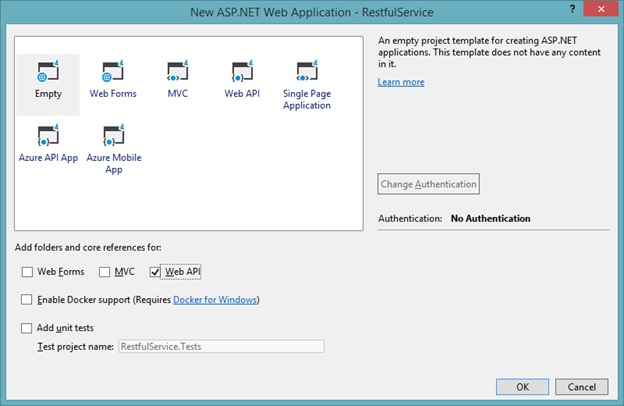
Open Visual Studio 2017. Select File->New->Project. Under Web section select ASP.NET Web Application (.Net framework) and name it RestfulService or whatever you want.

Next you select Empty and Web Api
Step 2
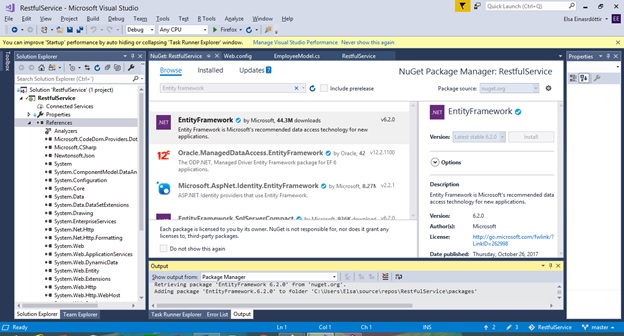
Now we have to install Entity framework to our project. So we right click on the Project and select Manage NuGet packages and select Browse to find Entity Framework and install it.
In the Web.config file we must add our connection string to the local database (included in Microsoft studio 2017) So under the configs sections we add this string:
<connectionStrings>
<add name="EmployeeDBContext" connectionString="Data Source=(localdb)\MSSQLLocalDB;Initial Catalog=aspnet-Employee;Integrated Security=SSPI;AttachDBFilename=|DataDirectory|\Employee.mdf" providerName="System.Data.SqlClient" />
</connectionStrings>
It will connect to our local database and create Employee catalog when we run the Application
Step 3
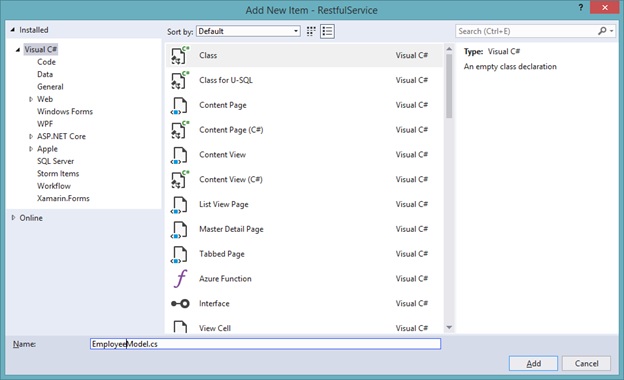
Now we add our Model class. Right click on the Models folder and select Add->Class and we call it EmployeeModel.cs
We must add code to our class. First we want to use Entity framework so we add this code:
using System.Data.Entity;
We want to have these properties in our database table so we add this code:
public int Id { get; set; }
public string Name { get; set; }
public string City { get; set; }
Then we add this code to the class to connect to the database. The EmployeeDBContect name must be the same as the name of the connection string in the Web.config.
public class EmployeeDBContext : DbContext
{
    public DbSet<EmployeeModel> Employees { get; set; }
}
Step 4
Now we want to add controller class. Right click on the Controllers map and select Add->Controller and select Web API 2 Controller with actions, using Entity Framework.
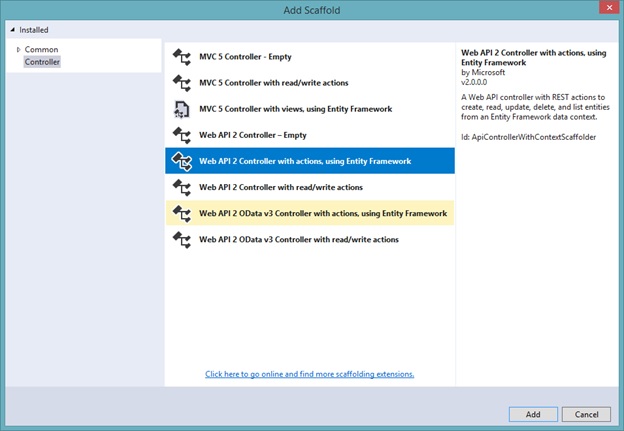
Then fill out like this:
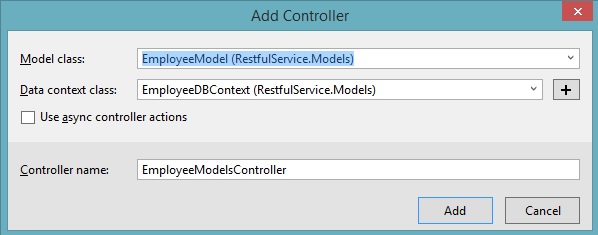
And click Add and wait and finally you should have class named EmployeeModelsController.cs under your controllers map. Now we run the application.
And you get page looking like this:
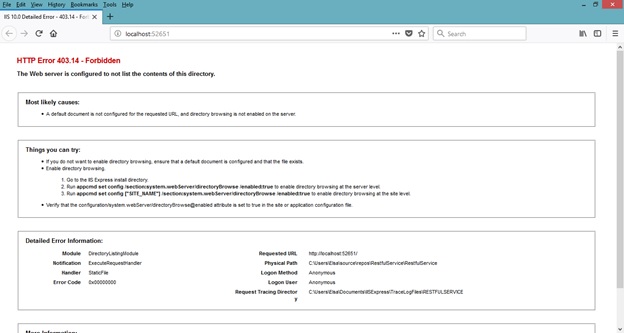
The reason of above error is we are not following the url structure which are set into the routing of web API application. The following is the default URL structure of ASP.NET Web API defined into the WebApiConfig.cs file. It should look like this: api/{controller}/{id}
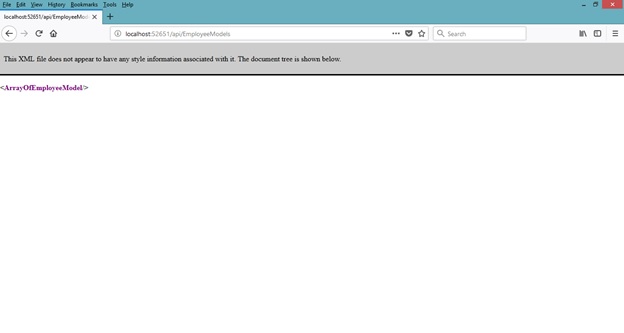
The browser supports Get request directly from URL. So we need to add correct url that would then be in this case http://localhost:52651/api/EmployeeModels and then we get this page:
So next we need to test this Rest Service, host it and add front end to it. I will do that in my next upcoming blogs. Here´s a link to this project on my Git account https://github.com/elsame/RestfulService